Design a landing page
Updated May 6, 2026
After you have created your webinar, you can customize the landing page using webinar editing. The landing page is the registration page for your webinar and therefore often the first point of contact for your participants.
In webinar editing, you will find another menu on the right side. You can use this to open and edit the landing page area.

In editing mode, recognizable by the tool icon, you can save up to three main colors of your corporate design. There are also three fonts to choose from. If necessary, this design selection can be saved as a default so that you can reuse it for future webinars.

Use the pen icon to edit the individual elements of the landing page. You can upload a suitable webinar image. The recommended image size is 512 x 512 pixels. Alternatively or in addition, a video can be integrated via YouTube.

The registration form can also be extended. You can add additional fields and determine whether they are optional or mandatory.
Be careful not to query too many fields. The more comprehensive the form is, the higher the hurdle for registration. Therefore, check carefully which information is really necessary and which fields should actually be mandatory.

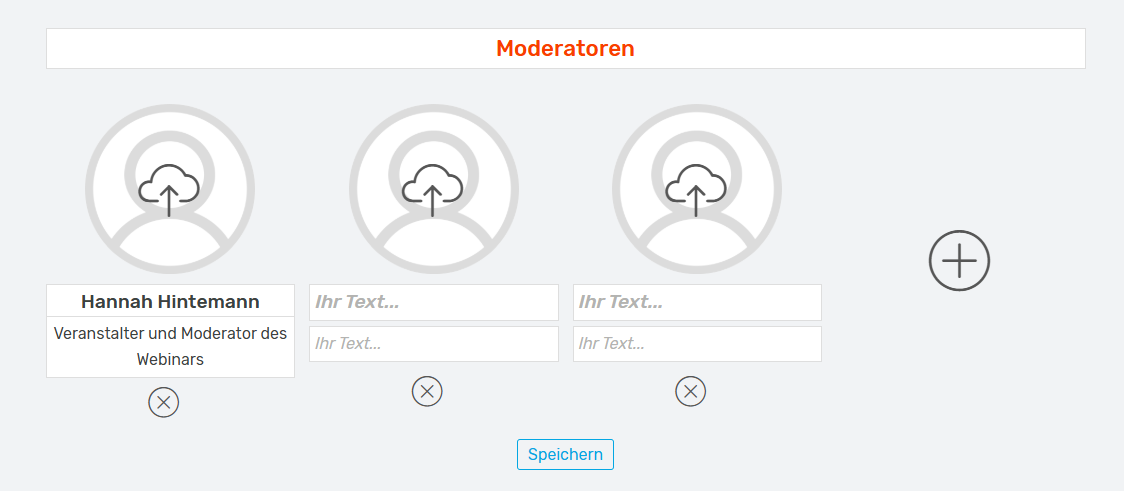
In the middle area of the landing page, you can present the main presenter and up to three co-moderators with a picture. This setting only affects the visual presentation on the landing page. The presenters actually stored in the webinar will not be changed as a result.
At the bottom, you can edit the description of your webinar.
When you select a word or sentence, a context menu appears. You can also make the text bold, italicized, or underlined. You can also use the diamond symbol to insert links.

After the landing page has been customized, you should check the automated emails.